>>
30-MINUTE MEALS! Get the email series now →


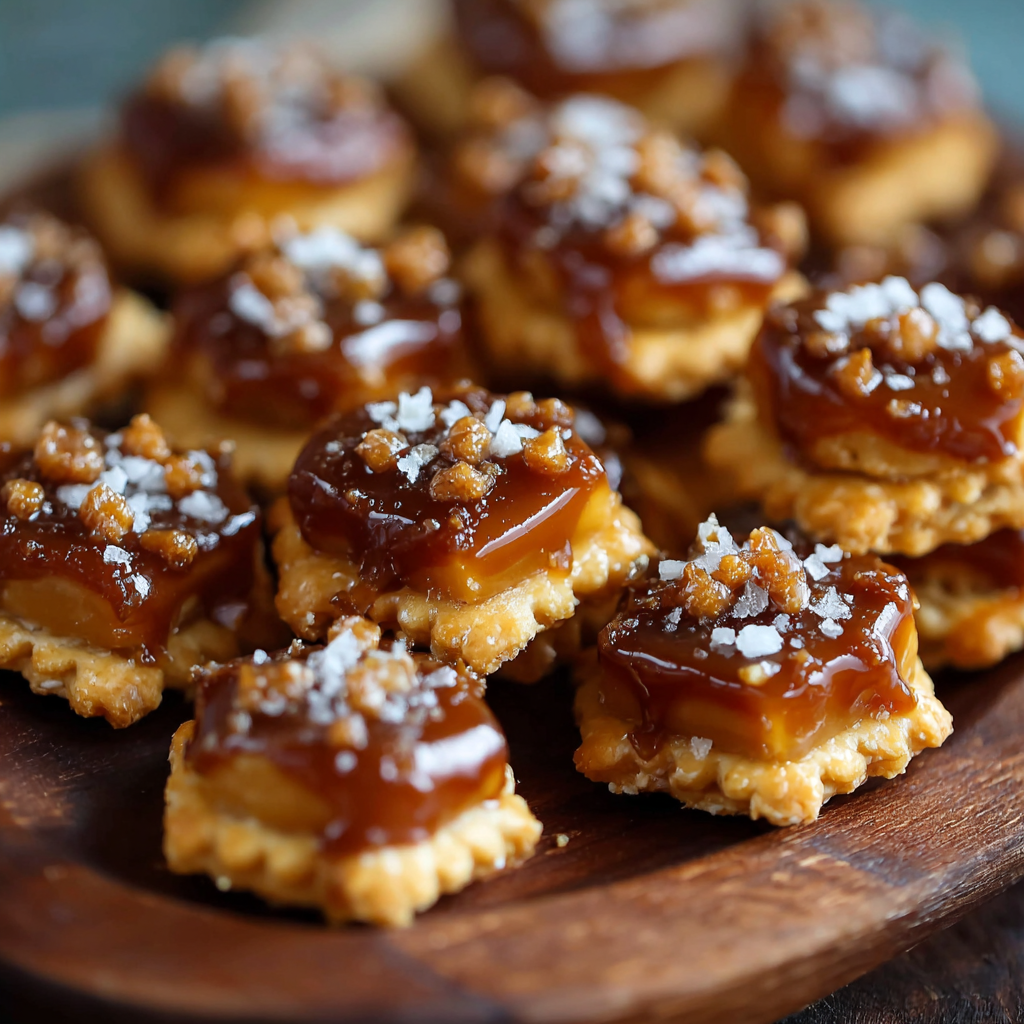
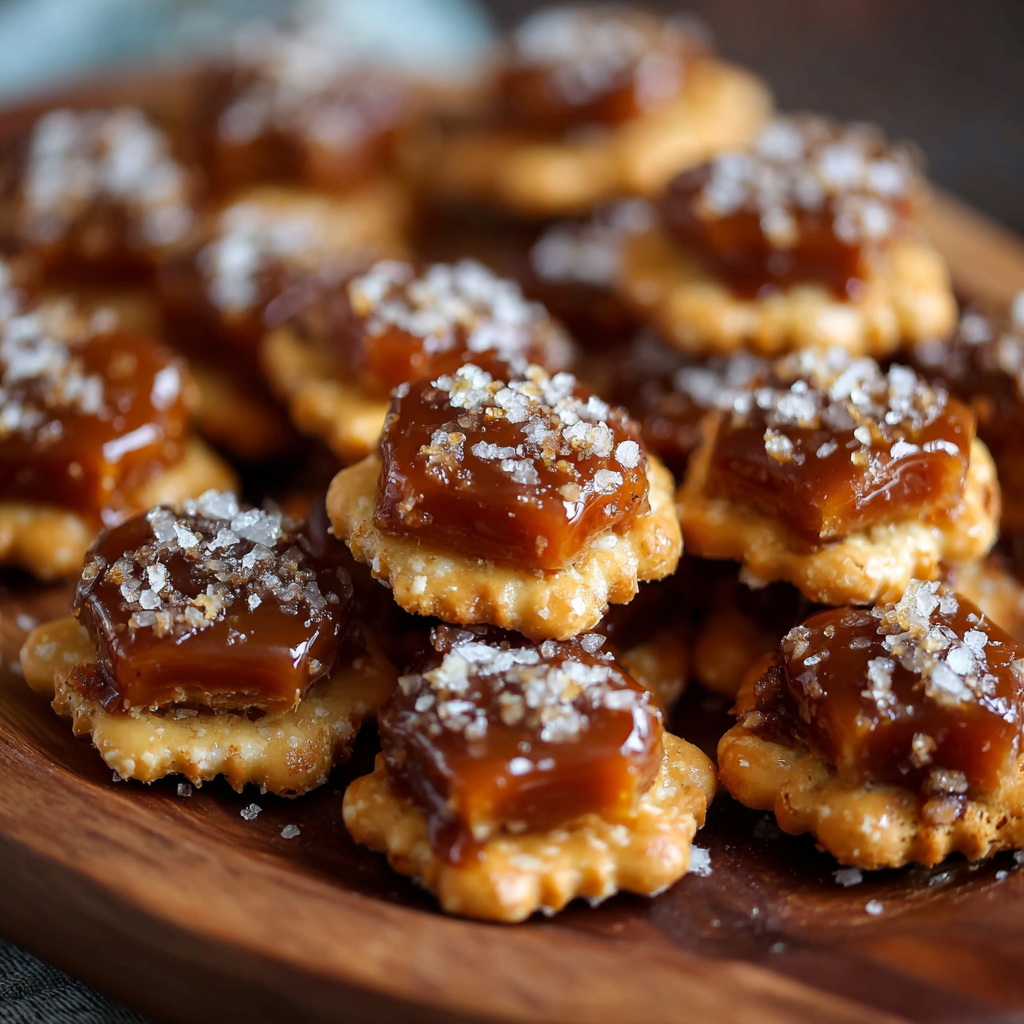
Sweet, salty, and irresistibly crunchy oyster cracker clusters glazed in a buttery caramel — a five-ingredient treat ready in under 30 minutes.

This salty-sweet cracker snack has been my go-to when I want something addictive and impossible to stop eating. I first discovered this combination on a rainy afternoon when I had a box of oyster crackers sitting in the pantry and a craving for something caramelized. The resulting clusters are crunchy, buttery, and carry that familiar toasted sugar taste with a bright nugget of sea salt. They are deceptively simple but deliver big flavor, which is why I keep the ingredients on hand year-round.
I remember bringing a batch to a potluck the first time I made them. The bowl came back empty and I had three different people asking for the recipe. The texture is the real star: the crackers stay crisp while the caramel creates glossy clusters that snap when you bite them. The sweet brown sugar caramel is balanced by a measured sprinkle of salt, and the optional cinnamon lifts the flavor with a warm note. This is one of those humble recipes that makes you feel like a kitchen magician — pantry staples transformed into something celebratory.
Since that first potluck, this recipe has become a default when I need a quick impressive snack. Family members take turns trying to guess what’s in the glaze, and the salty-crisp contrast always sparks the same delighted reaction. It’s the sort of treat that people remember after the event is over.
My favorite aspect is the instant nostalgia these create — the smell of browning sugar takes me back to holiday kitchens. Family members always fight over the corner pieces because the caramel pools there and becomes extra sticky and crisp. This recipe is the snack equivalent of a warm, familiar hug.
Store completely cooled clusters in an airtight container at room temperature for up to five days to preserve crispness. If humidity is high, a loose paper towel layer between clusters helps wick moisture. For longer storage, freeze in single layers on a baking sheet until solid, then transfer to an airtight freezer bag for up to three months. Thaw at room temperature; avoid refrigeration as it can make the caramel soft and the crackers lose their crunch.
Substitute unsalted butter with a vegan butter of comparable fat content to make the snack dairy-free, though the flavor will be slightly different. Swap light brown sugar for dark brown for more molasses depth, or use half white sugar and half brown for a milder caramel. If you need gluten-free options, use small gluten-free crackers that can withstand a glaze. Add chopped pecans or almonds during the toss for a nutty crunch — fold them in before baking so they toast lightly with the caramel.
Serve the clusters in a shallow bowl for parties or spoon them into small cellophane bags tied with ribbon for edible gifts. They pair beautifully with a robust coffee, hot chocolate, or a simple dessert wine. For holiday spreads, place near cheese boards to offer contrast to creamy cheeses. Garnish finished clusters with a light dusting of flaky sea salt for a gourmet touch.
Caramel-coated snacks are common in many cuisines as simple celebratory treats. This particular combination — using tiny crackers as the base — is an American pantry-solution approach: inexpensive, quick, and adaptable. The technique of boiling butter and sugar to create a coating has roots in classic candy-making, scaled down here to create an accessible crunchy confection that doesn’t require candy thermometers or specialized equipment.
In autumn, boost the warming profile with 1/4 teaspoon nutmeg and a pinch of ground cloves. For summer gatherings keep the spice light and add toasted coconut flakes after baking. At holiday time toss in a handful of red and green mini M&M candies once the clusters are cool for festive color. For a tropical twist, substitute half the brown sugar with coconut sugar.
Make a double batch and portion into 1-cup servings in resealable bags for grab-and-go treats. Cool clusters completely before sealing to avoid condensation. Label freezer bags with the date and use within three months for best texture. If you plan to ship or gift them, place waxed paper between layers in a sturdy box to prevent sticking and preserve the glossy finish.
This salted caramel cracker bites recipe is uncomplicated yet reliably impressive. Whether you’re making a quick snack for the family or a batch to share at a party, the simple combination of butter, brown sugar, and a sprinkle of salt produces a snack worth repeating. Give it a try and I promise you’ll be adding it to your tried-and-true list.
Use unsalted butter to control the final salt and add flaky sea salt at the end for contrast.
Stir constantly while bringing the caramel to a boil to prevent graininess and burning.
Line a rimmed baking sheet with parchment so clusters release cleanly once cooled.
This nourishing salted caramel cracker bites recipe is sure to be a staple in your kitchen. Enjoy every moist, high protein slice — it is perfect for breakfast or as a wholesome snack any time.
Allow clusters to cool completely on the baking sheet; this lets the caramel set so pieces break cleanly.
Yes — freeze fully cooled clusters in a single layer, then transfer to freezer bags. Use within 3 months.
This Salted Caramel Cracker Bites recipe makes perfectly juicy, tender, and flavorful steak every time! Serve with potatoes and a side salad for an unforgettable dinner in under 30 minutes.
Preheat oven to 350°F (175°C). Line a rimmed baking sheet with parchment paper and spread the oyster crackers into an even layer.
In a medium saucepan over medium heat, melt the butter and stir in the brown sugar, vanilla, and cinnamon. Bring to a gentle boil, stirring constantly, and cook 2 to 3 minutes until glossy and slightly thickened.
Remove caramel from heat and immediately pour over the crackers. Fold gently with a spatula so crackers are evenly coated, then sprinkle with salt.
Bake the coated crackers for 7 to 9 minutes in the preheated oven, watching closely to avoid burning. Look for bubbling and a slight change in color.
Allow to cool completely on the baking sheet until caramel firms. Break into clusters and store in an airtight container at room temperature for up to 5 days or freeze for up to 3 months.
Last Step: Please leave a rating and comment letting us know how you liked this recipe! This helps our business to thrive and continue providing free, high-quality recipes for you.
Leave a comment & rating below or tag
@kitchenfunwithmy3sons on social media!
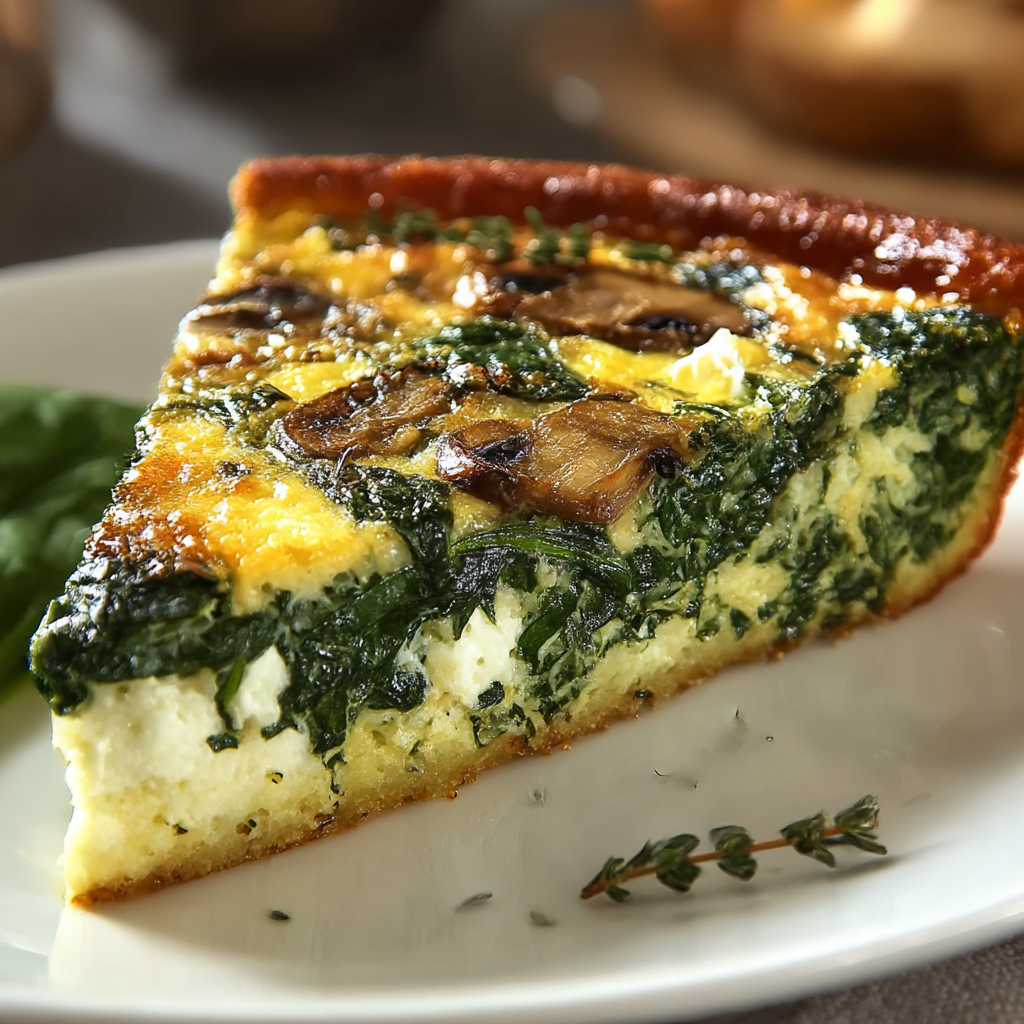
Fluffy crustless spinach quiche with cheddar and feta—an easy, gluten-free vegetarian brunch that comes together in under an hour.

Crunchy corn dogs filled with chopped shrimp, shredded crab, cheddar and a nacho-chip crust—an irresistible party snack that's crispy, savory and perfect for sharing.
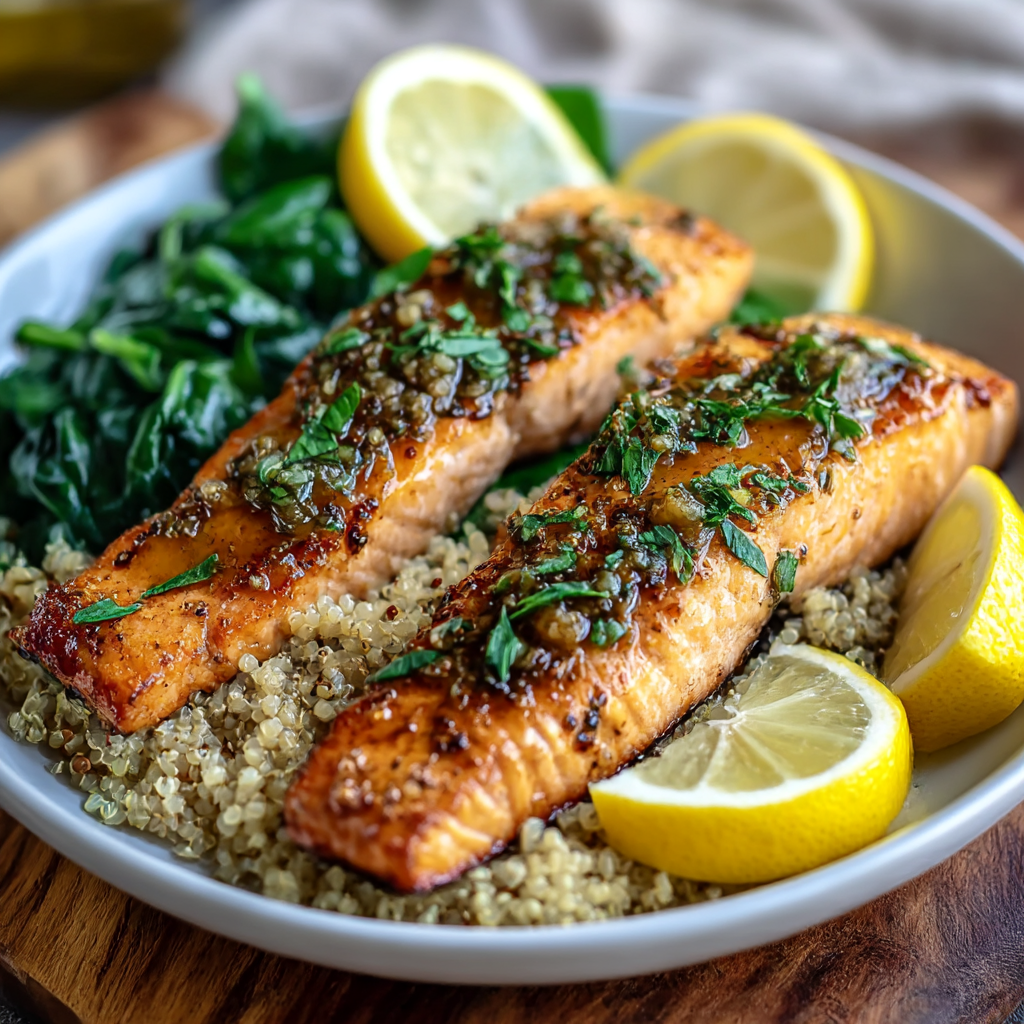
Tangy grilled salmon served on a bed of quinoa and baby spinach with a lively lemon herb accent. A quick Mediterranean main that is gluten-free and dairy-free.
Leave a comment & rating below or tag @kitchenfunwithmysons on social media!
Enjoyed this recipe? Share it with friends and family, and don't forget to leave a review!
This recipe looks amazing! Can't wait to try it.
Comments are stored locally in your browser. Server comments are displayed alongside your local comments.
Quick and easy dinner ideas delivered to your inbox.